Guest article written by Peter Hopkins
Hello all!
I’m Peter, a long time Netrunner player and rules-nerd based in the UK, and I go by unitled on the various forums. I played the Arkham Horror board game a whole bunch a few years ago, and while I love it, it’s undoubtedly showing its age as well as being a bit of a beast to get to the table. The card game is scratching the same itch so far, with the added bonus that I get to do lots of deck building!
Since the game has come out, I’ve noticed there were a whole load of questions as to how engagement works. It seems the Learn To Play manual isn’t hugely helpful on this, I think we had a few problems in our first game too.
I decided to put together a ‘beginner’s guide’ to engagement. If you’re unsure as to how engagement works or you’re looking for some starting tips on how to manage engagement, hopefully this article will help you! I’m going to be talking about the rules generally in this article; individual card text and rules will override the rules in specific situations, but this advice is a good starting point.
What is engagement (narratively)?
One of the things I like about the way the scenarios are structured is that the scale is flexible. In some Scenarios, a location is only a single room, in others a location can be a whole street or section of town.
This does however mean that engagement has a certain amount of abstraction associated. It represents a cultist or ghoul broadly aware of where you are and able to keep you under pressure.
They might be in the same room, foul spittle bubbling from their misshapen maws, or hot on your tail hunting you through an ancient glade. The foe has its attention focused on you and is able to stop you from doing anything which doesn’t deal with the monster directly, including running away. To escape you can either defeat it, or hide away from it!


What the rules say
The Learn To Play manual doesn’t necessarily spell engagement out very well, which is a shame as it’s one of the core mechanics and key to playing the game right. Let’s start by taking a look at what the Rules Reference manual has to say on engagement:
While an enemy card is in play, it is either engaged with an investigator (and placed in that investigator’s threat area), or it is unengaged and at a location (and placed at that location). Each enemy in an investigator’s threat area is considered to be at the same location as that investigator, and should the investigator move, the enemy remains engaged and moves to the new location simultaneously with the investigator.
Any time a ready unengaged enemy is at the same location as an investigator, it engages that investigator, and is placed in that investigator’s threat area. If there are multiple investigators at the same location as a ready unengaged enemy, follow the enemy’s prey instructions to determine which investigator is engaged. There is no limit on the number of enemies that can be engaged with a single investigator.
Let’s take this slowly and go through step by step. If you’re at a location, and there is a ready unengaged enemy there too, it engages you. This happens whether you’ve moved there yourself, the enemy is spawning or readying at your location, or the enemy has moved to you. This is the core of engagement. The engaged enemy is placed into your threat area, which is in front of you, above your assets and Investigator card.
It then sticks in your threat area (even if you Move!) until you spend an action to Evade it, it’s killed, or someone else engages it. Remember that enemies you’ve evaded previously can subsequently re-engage with you. If you want to escape altogether you need to Evade then Move away on the same turn!
And that is pretty much it. There’s no limit to enemies engaging you, and they don’t deal damage when they do engage you (this happens later, in the Enemy step). You can even attack other enemies at your location without being engaged!
What I’m not going to talk about too much here is how enemies decide who to engage. This article actually ended up being quite lengthy before I passed it to the editors, and I can feel that future articles might be able to cover this in more depth.
Broadly, though, an enemy drawn from the encounter deck will engage with the person to draw it. An enemy already at a location will prioritize its Prey target to engage, and failing that the lead investigator chooses where each enemy goes.
Why would I want to AVOID engagement?
The primary reason to avoid engagement is to avoid being damaged by enemies during the Enemy Phase, where they will only attack the Investigator they’re engaged with. If you’re engaged and can’t take another hit from the enemy, you need to break the engagement. Often you’ll do this by spending an action to Evade the enemy, or sometimes by someone else spending an action engaging them for you.
Secondly you want to avoid engagement to prevent Attacks of Opportunity. These can be really frustrating as you are unable Move, play cards, or use many card abilities without having to take damage. If Daisy needs to Investigate for those last few clues in a location, an engaged enemy will make that a painful experience!
It should be stressed then that Investigators low on Health and with poor Combat scores – like Daisy – will typically want to avoid engagement at all costs. Her Combat and Agility scores are poor, and she has a low pool of health. She won’t be able to Investigate or use her tomes without being attacked. Being engaged with enemies will severely limit her effectiveness, and it should be a priority for the group to deal with it as soon as possible!
 Why would I want to BE engaged?
Engagement sounds quite bad, right? Well, there are several reasons as why you might want to engage an enemy. Two main reasons: it pulls an enemy off another Investigator, and it allows the engaging Investigator to subsequently Evade (and therefore exhaust) the enemy to stop it attacking. You might even want to proactively engage enemies in these situations, either by moving in to locations with ready enemies before other Investigators or by spending the action to do so.
As such, Investigators skilled at evading enemies or with reasonable health pools are best suited to taking the lead on engagement. Wendy is a good example; she has high agility, cards that support evading in the Rogue and Survivor factions, and a decent combined Health and Sanity pool to allow her to shake off attacks.
Note that attacks directed at an enemy engaged with another Investigator are risky. While missed attacks on an enemy engaged with you generally have no other side effects, a missed attack against an enemy engaged with another Investigator will inflict friendly fire, and deal that attack’s damage to the other Investigator instead. Engaging the enemy before attacking them avoids this, and a particular card in the core set – Machete – gives a bonus for this approach. Look out for other similar cards coming in future expansions.
Strategies


Now we know the basics, we can think about how we can manipulate engagement to our advantage.
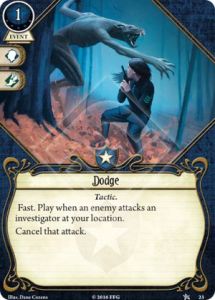
A nice tip to start with is to remember that engaged enemies move with their targets. While moving with an enemy engaged results in damage, often it’s worth the hit in order to move enemies into more favourable positions (and if it isn’t, you can Dodge the Attack of Opportunity!).
Roland’s special ability lets him discover a clue at a location if he defeats an enemy there. If he is at a location with no clues, he can potentially engage an enemy, move them into a location with a high Shroud value or plentiful clues, then Fight and kill the enemy. He’ll collect a clue, perhaps even supplementing this with Evidence! for an extra one. This gives you a very efficient use of actions combining killing enemies and investigating.
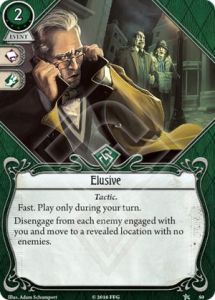
Other Investigators are able to use her cards to manipulate engagement with Agility and Evasion, like Wendy can. If you’re swarmed by enemies at a key location, you can use her to engage all enemies in her location during the Upkeep phase as they ready, and then use a card like Elusive to escape once the other Investigators have finished their turns and moved away during the next round. This means softer Investigators like Daisy can continue to hunt for clues, or a more damage focused Roland can continue to fight without risking his fairly loose grip on Sanity.

 Skids can do something similar by playing On the Lam; he can engage enemies from other Investigators and move them away to another location before Evading or playing Elusive himself. Non-Hunter enemies rarely move, so this can be a way of leading powerful foes on a wild goose chase to a location you don’t need to go back to!
Hopefully this has given you a taste for how engagement works and a few reasons as to when you’ll need to think about it. My opinion is that managing engagement is critical to succeeding in Arkham as enemies are a significant obstacle in your adventure, and one that different characters really need to think about how they approach. In the harder scenarios, every single action counts!

4 thoughts on “Introduction to Engagement”